dual tank water softener installation: what it involves
Dual tank softener installation takes 4-6 hours and costs $1,800-$4,500. See the manifold, valve setup, salt programming, and space requirements.
Dual tank water softener installation takes 4-6 hours and costs $1,800-$4,500. It needs a bypass, a manifold joining both tanks, a drain within 10-15 feet, a 120V outlet, and correct alternating valve programming.
- Installed cost
- $1,800 - $4,500
- Labor time
- 4 - 6 hours
- Footprint
- 30 x 48 inches
- Drain run
- 10 - 15 feet
- Salt per month
- 20 - 33 pounds
Some links on this page are affiliate links.If you buy through them we may earn a commission at no extra cost to you. We do not accept payment for rankings. Read the full disclosure.
Dual tank water softener installation takes 4-6 hours and costs $1,800-$4,500 installed. The extra time over a single tank goes into the manifold that joins both vessels and the valve programming that keeps them alternating. The plumbing itself is the same cut-in.
What the system looks like installed
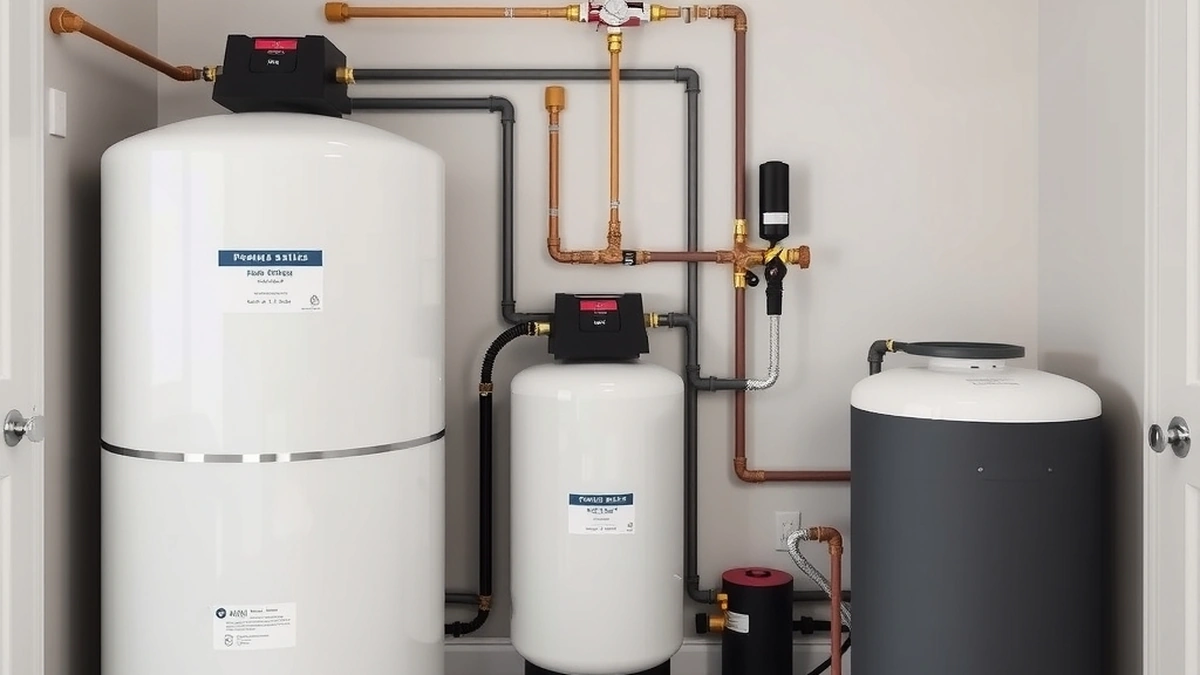
A dual tank water softener is an ion exchange system with two resin vessels sharing a brine tank. In the alternating design, one tank serves the house while the other regenerates, so softening never stops.
The installed assembly is three vessels: two tall resin tanks and one shorter brine tank. A manifold at the top connects both resin tanks to a single valve body or a pair of valves, depending on the design.
Space is the first thing to check. Two 10-inch tanks plus a 14-18 inch brine tank need roughly 30 inches of width and 48 inches of depth, with 12 inches above for valve service.
The manifold is the extra work
A single-tank install is one cut-in and two connections. A twin adds a manifold that splits flow between two vessels and returns it, with isolation valves on each leg so either tank can be serviced.
That manifold is where most of the additional labor lives. It has to be level, supported, and arranged so the valve can be removed without cutting pipe. A manifold that sags puts stress on plastic threads and cracks them within a year.
The bypass still goes on the main, ahead of the manifold. Three valves, or a single rotary bypass, let the house run on untreated water during service.
Installation, stage by stage
| Stage | Work | Time |
|---|---|---|
| Bypass cut-in | Cut main, fit bypass | 45 - 90 min |
| Tank placement | Level base, set both resin tanks | 30 min |
| Manifold assembly | Join tanks, isolation valves | 60 - 90 min |
| Brine tank | Position, connect brine line, safety float | 30 min |
| Drain | Run line with air gap and slope | 30 - 60 min |
| Programming | Hardness, capacity, reserve, regen time | 30 - 45 min |
| Commissioning | Manual regen, brine draw check, leak check | 45 - 60 min |
The commissioning step is not optional. A valve that never draws brine will soften for a few days and then pass hard water, and the homeowner blames the equipment rather than the setup.
Programming the alternating valve
The valve needs four numbers: hardness in grains per gallon, capacity per tank in grains, reserve, and regeneration time. Get hardness from a lab test, not a strip.
Capacity per tank should cover a full day of demand plus reserve. For 18 gpg at 250 gallons per day, daily removal is 4,500 grains; with a 20 percent reserve, each tank needs about 5,400 grains per day of capacity, which a 40,000-grain tank covers with room.
Regeneration time should sit at 2-3 a.m. when no one draws water. An alternating system can regenerate at any hour without service interruption, but nighttime avoids competing with showers for pressure.
Salt dose is the efficiency lever. A higher dose per regeneration uses more salt but delivers more capacity per pound up to a point; most residential valves are set at 8-12 pounds per regeneration.
Drain, brine, and the details that fail
The drain line handles 2-3 GPM during backwash and rinse, far less than a filter’s 5-10 GPM. A 10-15 foot run to a floor drain or standpipe is enough, with an air gap.
The brine line is a 3/8-inch tube from the brine tank to the valve. It must be free of kinks and loops, and the safety float in the brine tank must be set so an overflow does not flood the room.
The brine tank itself needs to sit on a level surface. A tank on an uneven floor tilts the float assembly and either overfills or fails to draw, both of which show up as hard water a week after install.
Cost and what moves it
Equipment $900-$2,500, labor $700-$1,700 for 4-6 hours, and fittings $100-$250. Low end: $900 + $700 + $100 = $1,700. High end: $2,500 + $1,700 + $250 = $4,450, which matches the $1,800-$4,500 band.
The variables are tank size, valve brand, and access. A metered valve with a twin-tank controller adds $250-$500 over a basic timer. A closet that fits one tank but not two adds a relocation cost that can exceed the equipment.
For the cost breakdown without install detail, dual tank water softener cost covers the ten-year arithmetic. And if you are still deciding between formats, dual tank versus single tank softener explains when the second tank earns its price, and water softener sizing turns your hardness number into a grain capacity per tank.
Commissioning checklist
- Open the bypass slowly and check both tanks for leaks at the manifold unions.
- Run a manual regeneration on tank A and confirm brine draw by watching the brine line.
- Verify the drain discharges at the expected rate and that the air gap is clear.
- Test hardness at a cold tap after the first full regeneration.
- Confirm the valve’s clock and regeneration time, then note both in the manual.
A twin that passes those five checks will run for years with only salt and an annual hardness test. One that fails step two will soften for a few days and then pass hard water, which is the most common complaint after a twin install and almost always a setup problem rather than a hardware failure.
Frequently asked questions
How long does a dual tank softener take to install?
Four to six hours for an alternating twin with a bypass, manifold, and drain. A parallel twin with two separate valves can take a full day.
How much space does a dual tank softener need?
About 30 inches of width for two 10-inch tanks plus a brine tank, and 48 inches of depth. Allow 12 inches above the tanks for valve service.
Can both tanks share one brine tank?
Yes, on alternating systems. One brine tank serves both resin vessels through a shared valve body, which is why the footprint is not double a single-tank unit.
Does a dual tank system need two drains?
No. Both tanks discharge through the same valve and drain line, so one drain connection within 10-15 feet serves the system.
What water pressure does a dual tank softener need?
Twenty to 125 psi for most valves, with 40-70 psi typical. Below 20 psi the venturi cannot draw brine, and above 125 psi a regulator is required.
How is the alternating valve programmed?
Set total hardness, capacity per tank, and regeneration time. The valve switches tanks when one exhausts, so the reserve setting must match daily demand rather than weekly.
Sources
Some links are affiliate links.If you buy through them we may earn a commission at no extra cost to you. We do not accept payment for rankings. Read the full disclosure.