Adding a shut-off and bypass for a softener
A three-valve bypass lets you service a softener without losing water. See the valve layout, the parts list, and the order to install it.
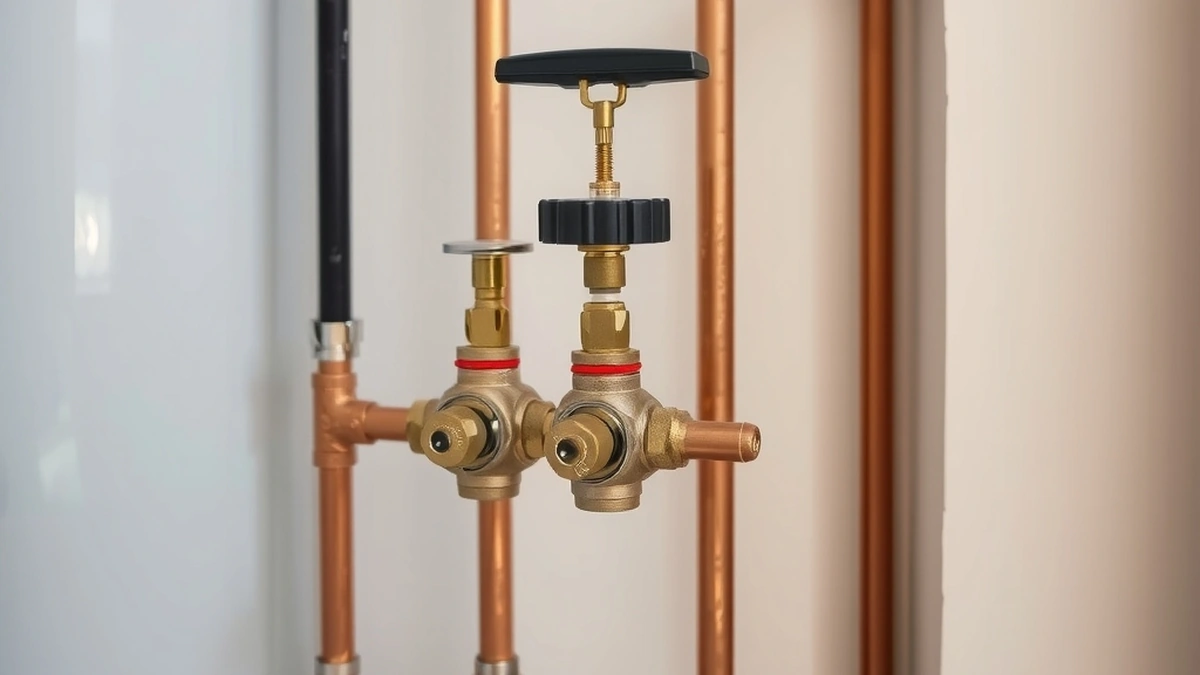
A softener bypass uses three valves: inlet shut-off, outlet shut-off, and a cross-connect between them. Close both shut-offs and open the cross-connect to send raw water to the house while servicing the unit. Parts run $60 to $200.
- Parts cost
- $60 - $200
- Labor
- $150 - $300
- Valve layout
- Three valves or one lever unit
- Pipe sizes
- 3/4 or 1 inch
- Install time
- 2 - 4 hours
Some links on this page are affiliate links.If you buy through them we may earn a commission at no extra cost to you. We do not accept payment for rankings. Read the full disclosure.
A softener bypass is three valves: one on the inlet, one on the outlet, and one connecting the two lines. Close the two shut-offs, open the cross-connect, and raw water goes straight to the house while the softener sits isolated. It is the difference between a 30 minute repair and a day without water.
Why You Want One
Every softener eventually needs service. Resin replacement, a valve rebuild, a leaking fitting, or a brine line repair all require the unit to be depressurized and opened. Without a bypass, that means shutting the house main and draining lines, or cutting and capping pipe.
With a bypass, the sequence is: close inlet, close outlet, open cross-connect, open a downstream tap to relieve pressure, then work on the unit. The house keeps water at raw hardness for the duration, which is a nuisance, not an outage.
There is a second use. If the softener fails and you cannot get a repair for a week, the bypass keeps the house running. That alone justifies the parts cost.
The Three-Valve Layout
The arrangement is a pair of tees between the softener and the house piping, with a valve in each leg and a valve in the bridge between them.
| Valve | Position in service | Position in bypass |
|---|---|---|
| Inlet shut-off | Open | Closed |
| Outlet shut-off | Open | Closed |
| Cross-connect | Closed | Open |
The critical detail is valve placement. The shut-offs must isolate the softener, not the house. That means they go on the branches feeding the softener, and the cross-connect bridges between those branches. If you put a single shut-off on the main line, you have built a house shut-off, not a bypass.
Valves should be full-port ball valves. A standard-port valve in a 1 inch line adds measurable restriction at peak flow, which is the same problem described in water pressure and filters.
Parts and Cost
A basic three-valve assembly in 3/4 inch:
- Two full-port ball valves, $12 to $25 each
- One cross-connect ball valve, $12 to $25
- Two tees, $4 to $8 each
- Pipe, fittings, and unions, $20 to $50
- Total parts, roughly $60 to $200 depending on material and size
Labor runs $150 to $300 for a plumber, more if the existing piping is galvanized or the space is tight. A single-lever bypass assembly, sold as one unit that mounts on the softener valve, costs $80 to $200 and installs faster.
Copper versus PEX: copper lasts longer and handles heat, PEX is faster and cheaper to install. Either is acceptable for cold softened water. Do not use PEX within 18 inches of a water heater flue or in direct sunlight.
Single-Lever Versus Three Valves
| Feature | Three valves | Single lever |
|---|---|---|
| Parts cost | $60 - $200 | $80 - $200 |
| Operation | Three handles, easy to get wrong | One handle |
| Flow restriction | Low with full-port valves | Varies by design |
| Service access | Good | Good |
| Best for | Custom installs, large pipe | Standard residential swap |
The single-lever unit is what most installers use because it eliminates the possibility of leaving the system in a half-bypassed state, which is a real failure mode. A homeowner who closes the inlet, forgets the outlet, and opens the cross-connect has created a dead-end loop and will be confused when pressure drops.
Installation Order
- Shut off the house main and drain the lines. Open a low tap to confirm.
- Mark the cut points on the inlet and outlet lines, leaving room for the tees and valves.
- Cut and dry-fit the assembly before soldering or crimping. Confirm handle clearance.
- Install the tees and valves, with the cross-connect between the two branch lines.
- Pressure test at line pressure for at least an hour, then check every joint with a dry paper towel.
If the softener is being installed new, the bypass goes in at the same time and adds maybe $100 to the install. Retrofitting a bypass to an existing softener is a bigger job because the piping has to be cut and reworked in place.
Mistakes That Cost Money
The most common is a bypass built with the cross-connect on the wrong side of the shut-offs, which produces a loop that bypasses nothing. The second is using a gate valve that no longer seals; gate valves stick and are hard to tell open from closed. Ball valves with levers are unambiguous.
The third is skipping unions. Without unions at the softener connections, removing the unit for service means cutting pipe. A pair of unions costs $10 and saves an hour of labor later.
The fourth is installing the bypass downstream of a check valve or a pressure-reducing valve in a way that lets backflow into the softener. Local codes vary on backflow protection for treatment equipment, so confirm with the authority having jurisdiction. That is the same body that decides whether the install needs a permit, covered in permit for a water softener.
Living With a Bypass
Label the handles. A small tag on each valve reading “service” and “bypass” prevents the half-open confusion that causes most “my softener stopped working” calls. The diagnostic sequence in softener stopped softening starts with exactly this check.
Test the bypass once a year. Close the inlet, open the cross-connect, run a tap, and confirm water flows. Then restore service position. A bypass that has seized from disuse is not a bypass when you need it.
If the unit is in a crawl space or a tight closet, add a drain pan and route the brine line with a visible air gap. Those details are covered in drain requirements for a softener and matter more than the valve brand.
Frequently asked questions
Why does a water softener need a bypass?
A bypass lets you isolate the softener for service, resin changes, or repairs while still supplying raw water to the house, so you are not without water during maintenance.
What is a three-valve bypass?
Two shut-off valves on the inlet and outlet lines plus a cross-connect valve between them; closing the shut-offs and opening the cross-connect bypasses the softener.
Is a single-lever bypass as good as three valves?
It is faster to operate and less prone to confusion, but it costs more and some designs restrict flow more than a full-port three-valve arrangement.
Where should the bypass be installed?
Directly on the softener inlet and outlet, before the unit's control valve, so the whole unit can be isolated without shutting off the house main.
Can I install a bypass myself?
Yes on PEX or copper with basic plumbing tools, though soldered copper work and tight spaces are reasons to hire a plumber.
Does a bypass valve reduce water pressure?
A full-port valve in the open position adds negligible restriction; a standard-port valve adds more, which matters on a 1 inch line serving a large house.
Sources
Some links are affiliate links.If you buy through them we may earn a commission at no extra cost to you. We do not accept payment for rankings. Read the full disclosure.